It’s inevitable, at some point in your life you will experience loss or trauma. I don’t say that to be harsh, it’s just a true part of life. Oftentimes these moments of loss and trauma lead to an emotion you are probably familiar with….grief 😔.
Grief is a normal part of the human experience and it’s easy to get lost in. Trust me, I know. I’ve been lost in my own grief before and it can feel impossible to get out of. Like you’re stuck in a pool of molasses with no way to get to the edge. But YOU CAN move through it. YOU CAN feel whole again. How do I know? Because I was able to do it myself through my yoga practice 😊.
Here is my yoga for grief; I hope it carries you through this period like it did for me.
Yoga for Grief
Grief does not occur only from losing a loved one. In reality grief stems from trauma. You might grieve a major life change, like a divorce. You could have had a very hard upbringing and grieve for the childhood you wish you could have had, or an accident causing intense physical pain causes you to grieve the past. There are many avenues to grief and everyone will experience it at some point in their lives, just as everyone will experience some form of trauma.
Can Yoga For Grief Really Help You Cope?
YES!!
Traumatic experiences, which often lead to feelings of sadness or grief, cause dysregulation of the nervous system putting you in your sympathetic system (stress response) with higher cortisol levels.
You already know that yoga shifts you into your parasympathetic system (rest and digest). Being in your body’s natural state allows it to do what it needs in order to process and release toxins properly, whether that be physically, emotionally, or energetically.
Science even backs the theory that practicing yoga reduces stress, lowers anxiety and depression, and regulates the nervous system.
The Uplifted Perspective
Move Grief Through The Chakras
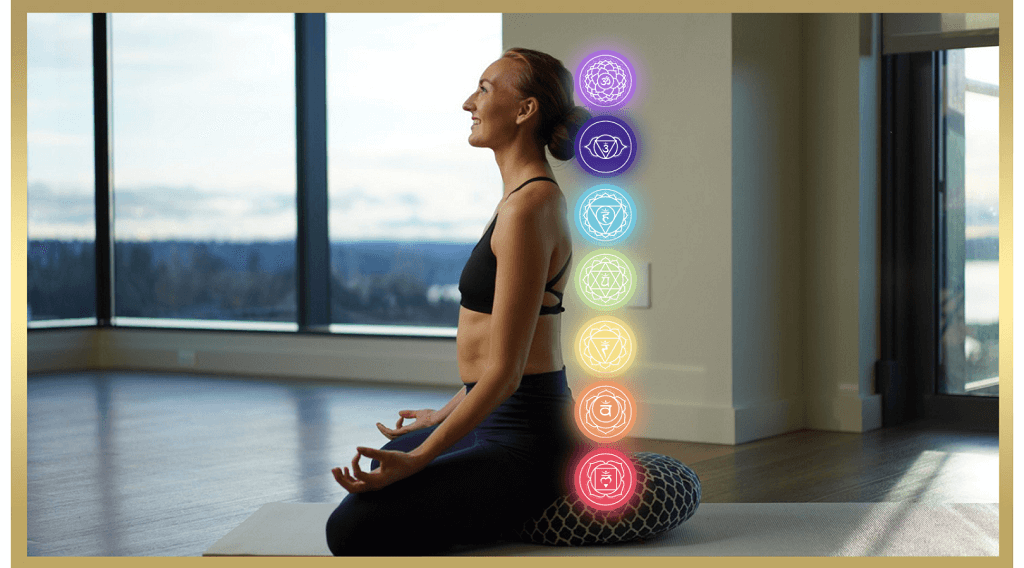
Although grief may live in the heart chakra, you need to work from the root up in order to move through this powerful emotion. Grief can challenge your safety (root chakra), make you not want to feel (sacral chakra), and sometimes make you feel stuck with no way out (solar plexus chakra). This is why you need to spend some time with each energy center to heal and move the energy through in order to come into that heart space.
Then continue to work through the chakras to connect to higher consciousness. Because the real purpose of yoga, and of life, is to connect with the Divine. The grieving process is your moment to connect. Listen to your soul’s call to connect to the higher self.
The Bhagavad Gita says that every human longs for a fulfillment that the five senses cannot provide and this can only be obtained by connecting the self to the higher self. The chakras can help you do this. Look to my Uplifted membership for all of my in depth chakra courses, or I have TONS of chakra resources in the blog.
Keep in mind that grief is one of the 8 obstacles/meannesses of the heart. These are attributes of the ego and until you come out of these you can not feel universal love. This is why it’s so important to do this work, because you DESERVE to feel the universal love that surrounds you and find peace.
Want to know exactly what I did to work through my own grief after losing my father? I wrote all about it, and tips for creating your own yoga practice, in my book Yoga Life.
Grief And Polarity
When grief happens, you probably don’t want to deal with it. That’s understandable. It’s hard, it’s painful, and it’s normal to not want to feel the bad things. But, as wellness leader Kris Carr said to me in one of my recent podcast episodes: “You can’t amputate your emotions and expect to feel whole”. Just sit with that for a minute. 🤯
Listen to this grief podcast episode now:
Two things can be true at once. You can be sad and anxious about your loss but you can also be happy and excited to move in a new direction. You can feel happy and fulfilled with your family but still sad that someone is no longer there to enjoy it with you. One does not detract from the other.
This is the beauty of polarity. You can be an anxious person and love life. Yoga is about transcending this polarity to connect to your higher self. So much of life is magnificent and parts of it are painful too. Pause and reflect on those moments, determine where you want your focus to be, on the light or the dark, and how to move forward. Meditate to come back to yourself and reconnect with your divine essence. This is a good place to start asking “what” instead of “why”. Instead of “why did this happen? Why do I feel this way? Or, why can’t I move on?” ask, “What can I do to move forward? What will help this emotion move through me more easefully? What steps do I need to take right now for balance?”
The last thing I want to note before giving you physical postures to move grief through the body is grief breeds loneliness. Loneliness is an excess or imbalance of vata because it is made of air and space. A lack of connectedness. This is why grounding is important to help counteract these feelings.
Grief yoga combines postures and movements that will ground you and help this energy move through. Never forget, emotion is energy in motion which means it needs to MOVE, so don’t hold it in, no matter how much it might hurt in this moment. When doing grief yoga classes, just focus on holding space and nurturing yourself.
Learn more about this in my Yoga For Self Mastery online course.
Top Yoga Poses for Grief
1. Hip & Neck Rolls
Step 1: Stand tall, shoulders down and back, slight core engagement. Start to roll the hips in slow gentle circles.
Step 2: Begin to roll the neck in time with the hips, drop one ear to the shoulder, exhale as the head drops, chin coming into chest. Inhale as the chin comes up opposite the ear to shoulder.
Step 3: Switch directions. Go at whatever pace feels right for you.
Variations: You can do the neck rolls seated, or roll both the hip and neck from a table top position.
Benefits: Not only does doing these rolls release tension along the spine and in the hips and increase mobility, but it connects you with your body on a deeper level. It moves the energy encouraging any stagnant parts to release and let go.
Uplifted Pro Tips:
- Add wrist rolls into the lineup as well to make this even juicier.
- Take a pause and do this between cat/cow transitions to connect with the body on a deeper level.
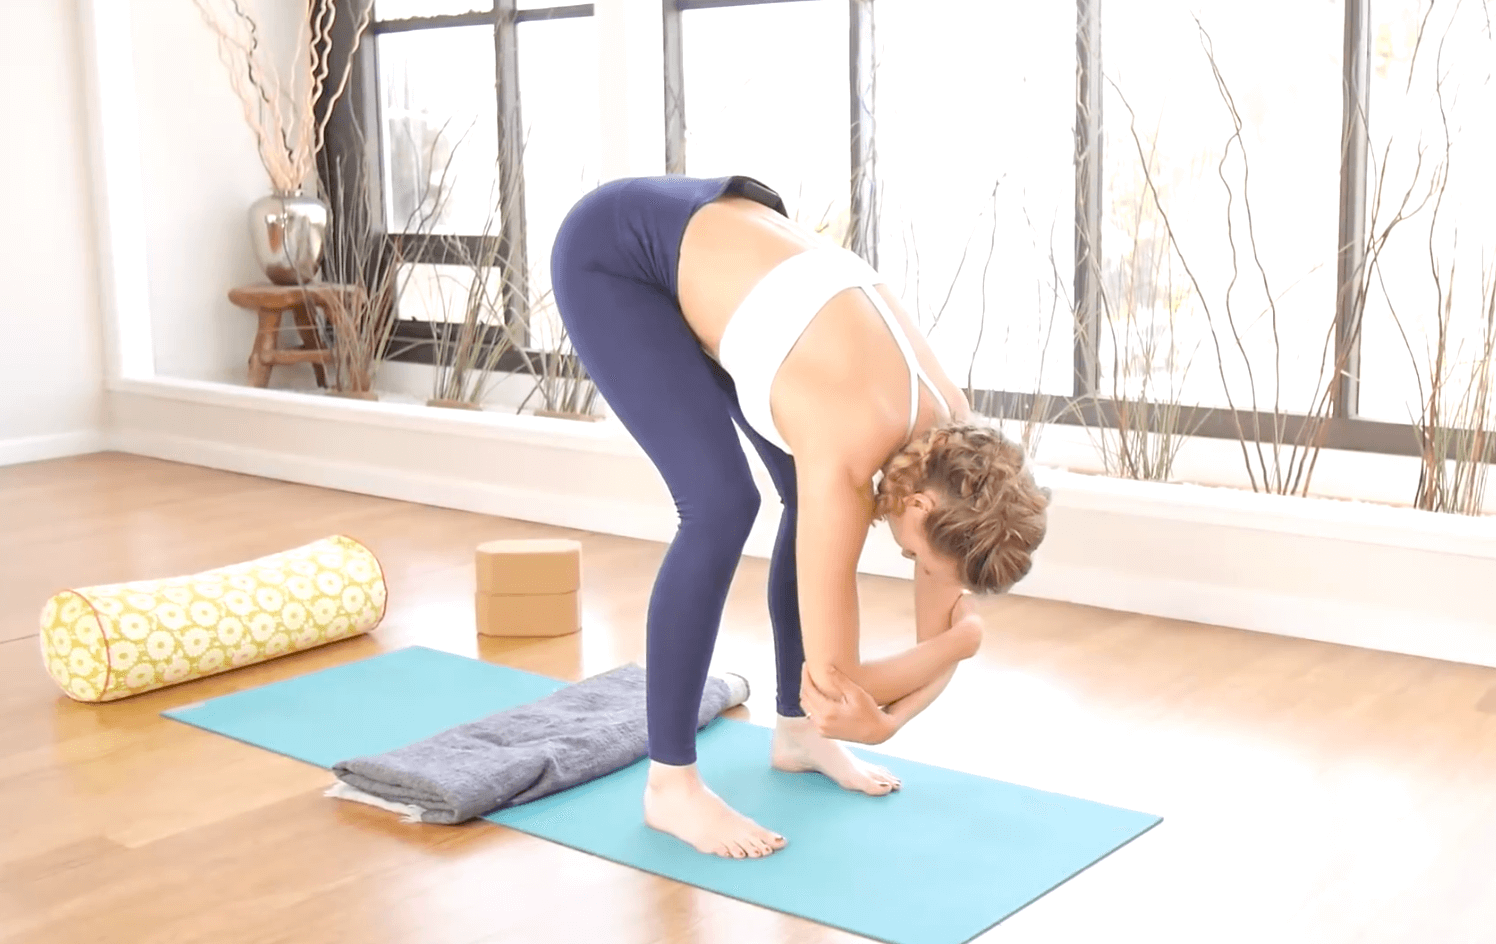
2. Standing Forward Fold (Uttanasana)
Step 1: From a standing position, feet hip width apart. Inhale as the arms sweep up overhead.
Step 2: Exhale, with a slight bend in the knees, hinge forward at the hips letting the arms float down to the floor, torso folds.
Step 3: Let gravity have your head but not your shoulders. Stay here for several breaths.
Add in undulations: Slowly roll up one vertebrae at a time, round through the low back, mid back, then upper back. Head is the last thing to come up. Take the feet out a bit wider. Present the heart to the ceiling and roll the chest forward and lead with it as you fold back down in a fluid motion. Roll back up and repeat for several rounds. NOTE: Use the hands to support you by keeping them on the thighs or tops of knees.
Step 4: To come out, inhale, bend the knees and sweep the arms up to standing. Exhale as the arms return down to your sides.
Variations: You don’t have to have straight legs in a forward fold! Bend the knees deeply or take the feet wider. Place the hands on yoga blocks, clasp opposite elbows to hang, or use a chair or table to assist you by placing the hands on one and only coming halfway down.
Benefits: This yoga pose is an inversion, increases blood circulation, lowers blood pressure, helps to ease headaches and pain in the backside of the body. Puts gentle pressure on the gut and massages the digestive organs and brings focus inward. Another of my favorite poses.
Uplifted Pro Tips:
- During spinal roll ups do a big loud releasing breath as you come back down to encourage emotional release and give extra love to the spine.
- Add in some spinal twists here: Bend the left knee generously, left hand to mat, as you inhale bringing the right arm up and open up the right side. This will invite more clarity and aid in emotional release.
3. Woodchopper
Step 1: Stand. Micro-bend the knees, lengthen the tailbone down and pull the navel up and in to create a strong foundation.
Step 2: Clasp the hands together into fists, inhale as you bring the fists and arms overhead
Step 3: POWERFULLY exhale as you bring your arms, hands still clasped, down through the center of your body (like an ax chopping wood)
Step 4: Repeat the motion for several breaths, on final inhale bring the arms up and hold the breath, lift pelvic floor, pull navel in, feel the energy rise. Release as necessary.
Variations: If you don’t feel stable standing you can sit in an easy seat or a chair. Go as fast or as slow as is comfortable for you and your breath.
Benefits: Works the core, stabilizers, and upper body. Moves energy up and out, great for releasing stuck emotion/emotional liberation.
Uplifted Pro Tips:
- Visualize chopping through a dark forest or some gnarly overgrown thorns to help clear that stuck energy.
- Don’t let your face scrunch up doing this. Keep the jaw relaxed and let the power come from your navel.
Give this move a try with this yoga class:
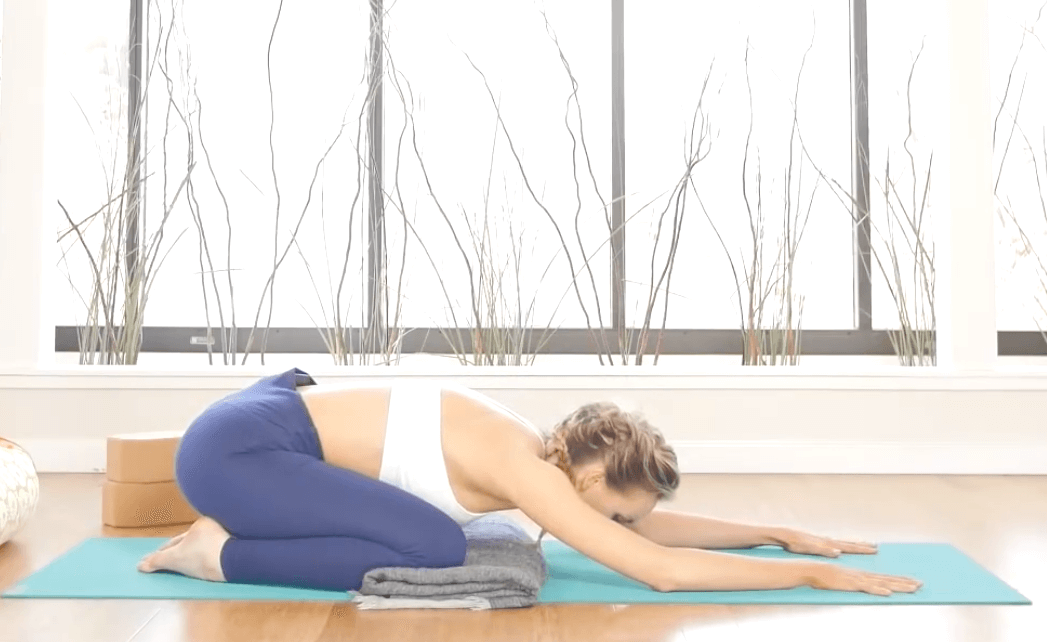
4. Child’s Pose (Balasana)
Step 1: Begin on hands and knees, take your hips back to your heels. Knees can be touching or as wide as the mat.
Step 2: Rest the forehead to the mat, close your eyes.
Step 3: Soften the upper body and extend the arms in front of you.
Step 4: Simply inhale rise back to all fours to come out of the pose.
Variations: Hug a bolster for a restorative yoga version. You can also put a block under the seat between the heels or under the forehead.
Benefits: Opens the back body and releases the glutes and hips. This pose brings focus inward, cooling the body and soothing the nervous system. Increases mindfulness and awareness.
Uplifted Pro Tips:
- Bring the hands together at prayer at the front of your mat to encourage further surrender during the grieving process.
- If this is all you can do, honor that. It’s still a practice. Add in some affirmations, “I am strong, I will move through this”.
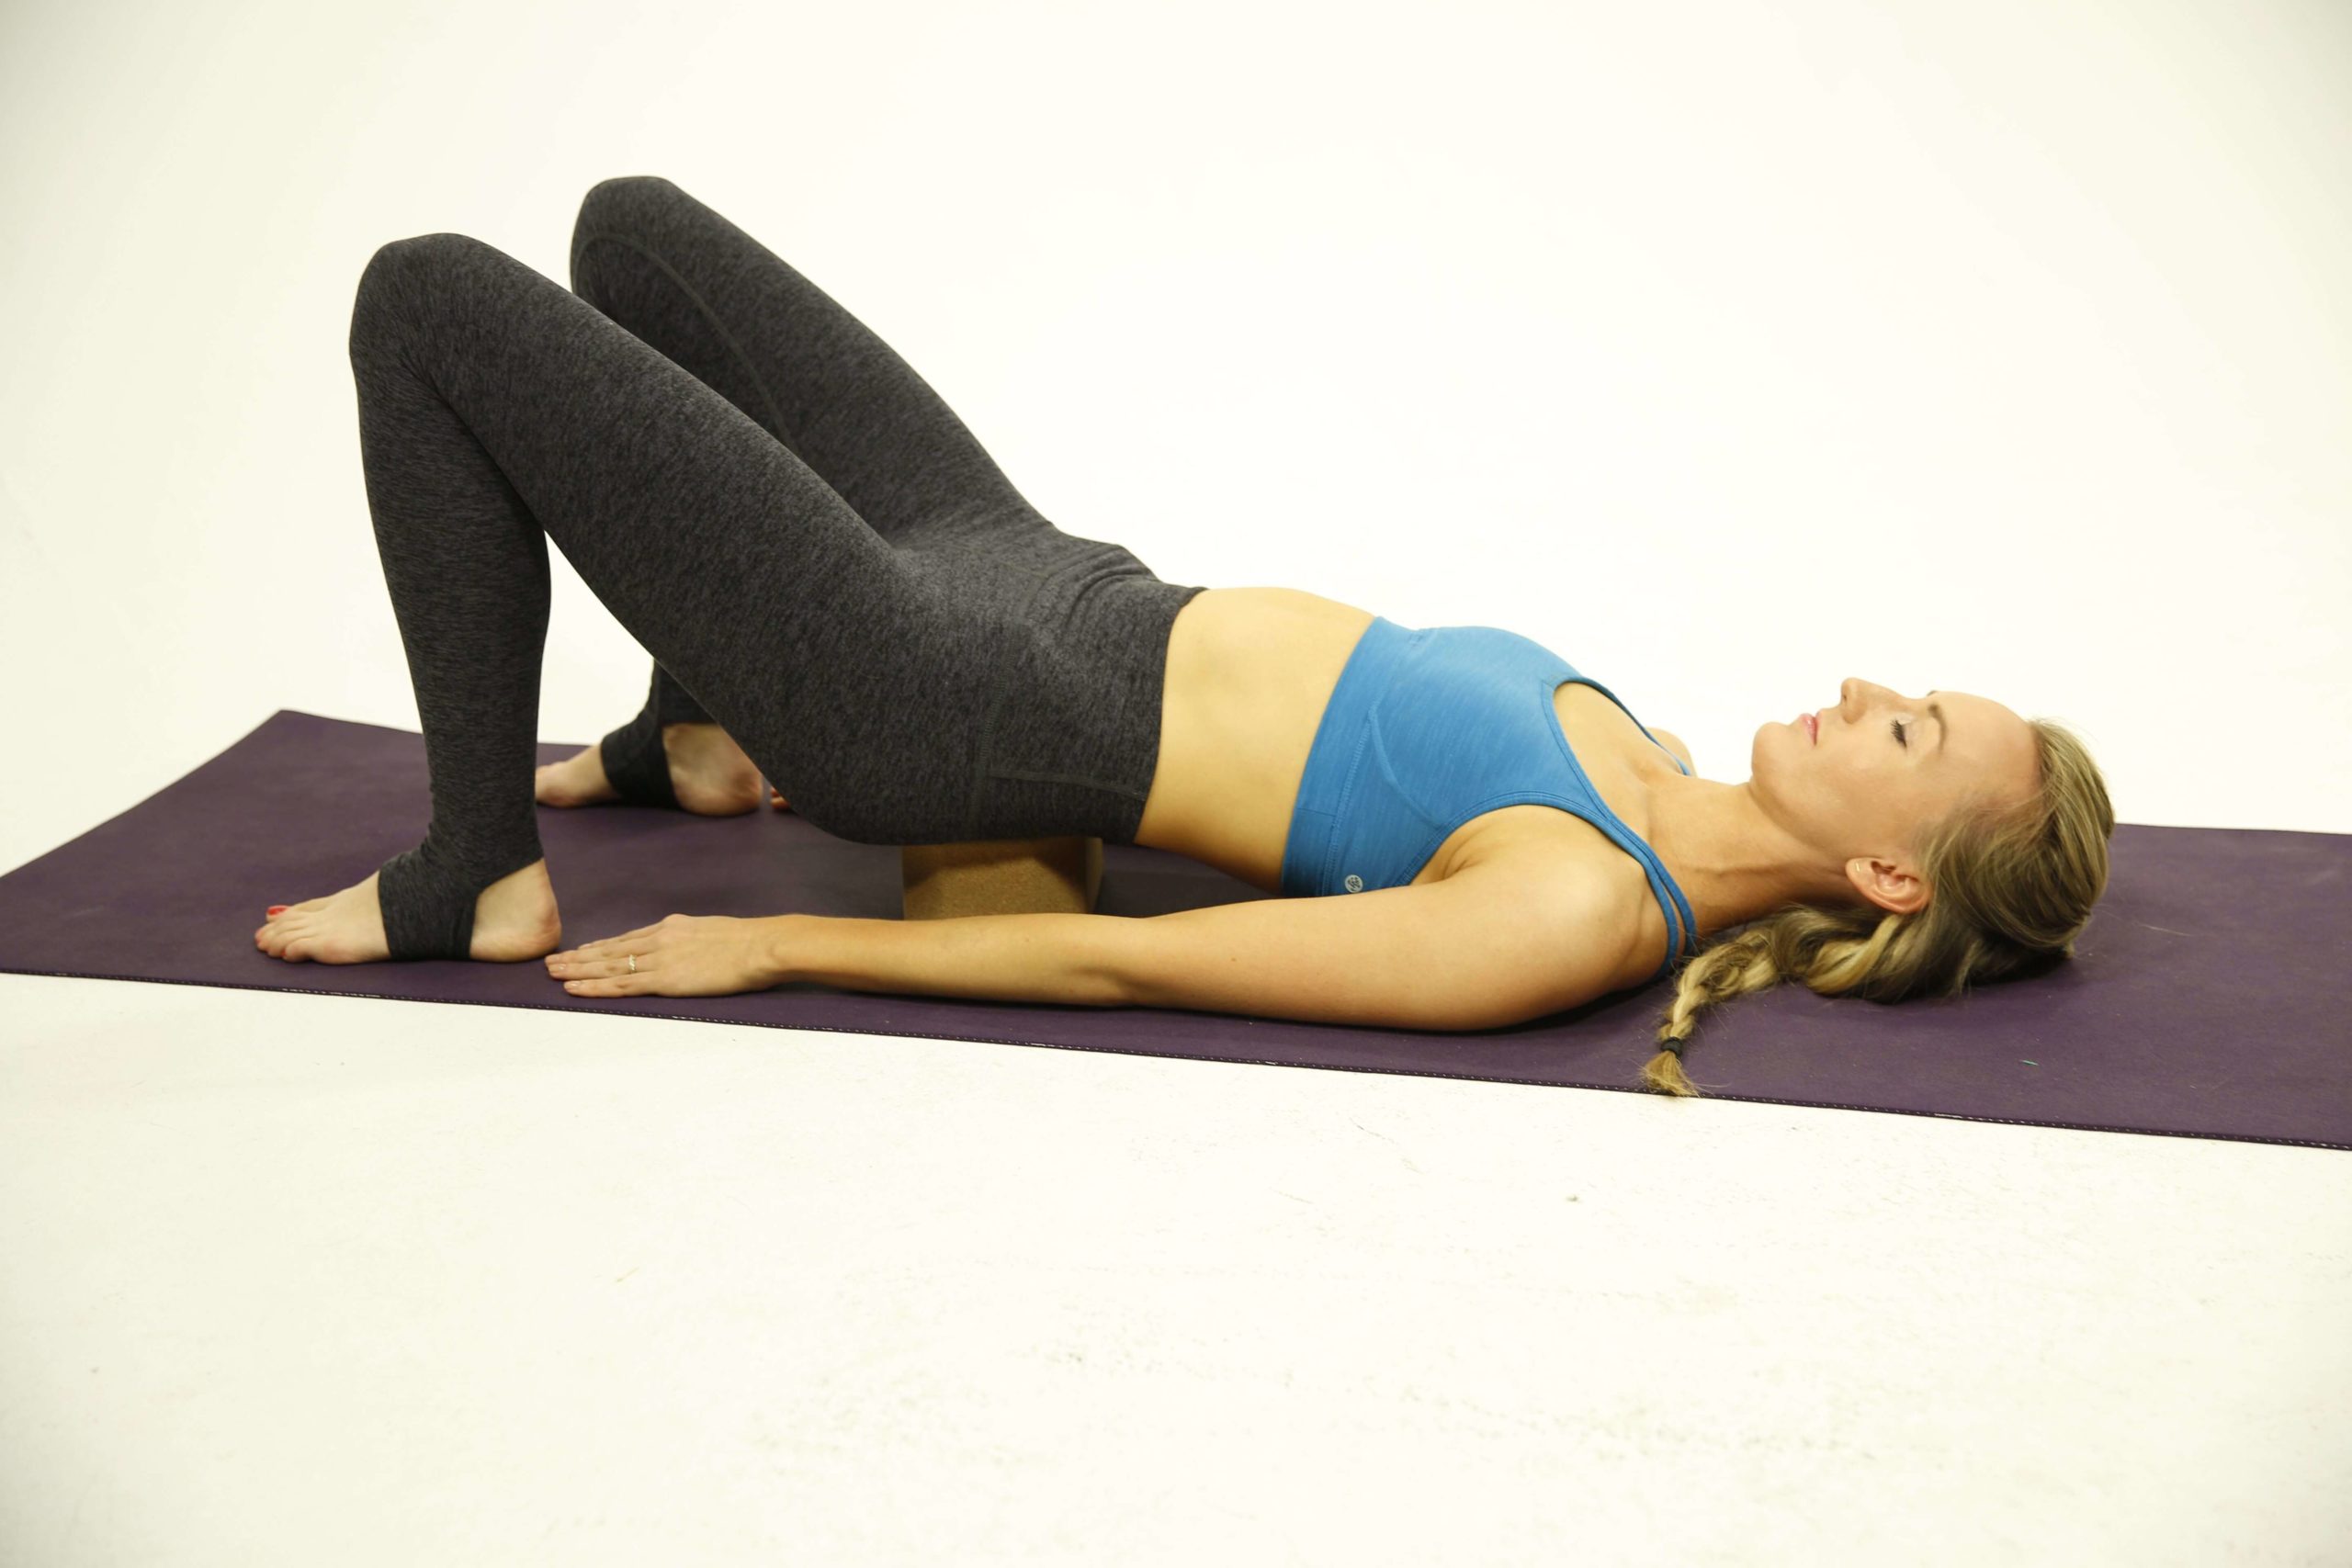
5. Supported Bridge Pose (Setu Bandha Sarvangasana)
Step 1: On your back, bring the soles of feet to the mat hip width apart, ankles under knees. Arms by your sides.
Step 2: Slowly inhale as you lift the hips up. Place a block beneath the hips to support your weight and relax onto it.
Step 3: Place hands by your sides or on the belly. Exhale and hold for several breaths. When you are ready to come out slowly release the hands, lift to remove the block and exhale and send the hips back to the ground.
Variations: Play with the height placement of your block. Use a bolster or a blanket to support your low back too and make this as restorative as possible.
Benefits: This yoga pose relaxes the hips, pelvis, and abdomen. As an inversion this pose will help with circulation but also trigger the parasympathetic nervous system to let your body and mind relax, reduce anxiety and stress.
Uplifted Pro Tips:
- Bring fluid movement to connect with the body and encourage release by rolling the hips up and down with the breath or making small circles.
- This is a great position to do diaphragmatic breathing techniques.
Give this yoga class a try:
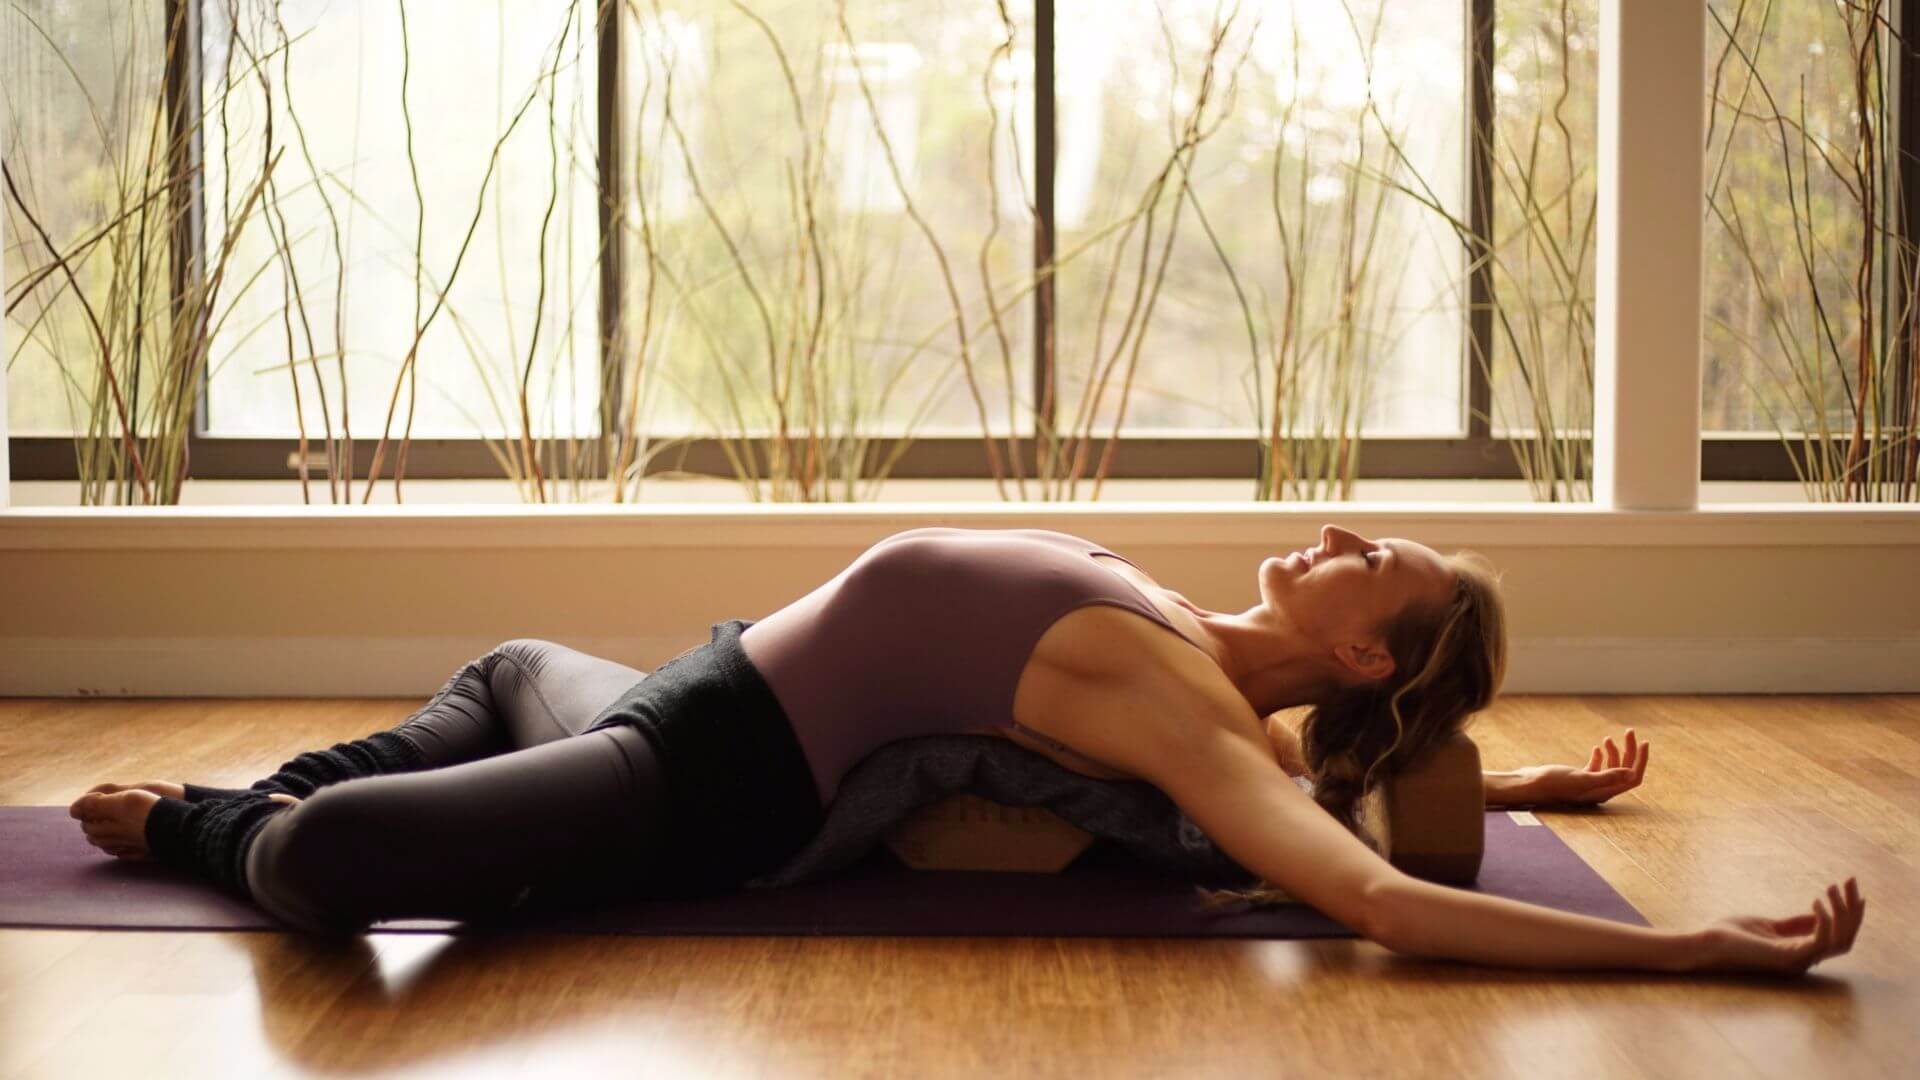
6. Reclined Bound Angle (Supta Baddha Konasana)
Step 1: From Dandasana: place a bolster at the base of your spine, bring the soles of feet to touch to create a diamond shape. Place blocks or blankets under the knees for extra support.
Step 2: When your props are positioned comfortably, lay back over your cushion(s). Cover yourself with a blanket, maybe have an eye mask you can place over the face.
Step 3: Breathe deeply as you let all your body parts get heavy, come to complete relaxation.
Step 4: Stay as long as you like, when ready begin with small movements and slowly lift yourself out of the posture.
Variations: Use all of the props! You want to feel fully supported in this position in order to completely relax and release.
Benefits: Regulates hormones, opens the hips, the chest and relaxes the mind. It’s the perfect posture to rest and bring down cortisol levels which may be high when you are in the throes of grief.
Uplifted Pro Tips:
- Slide the backs of the hands up and down along the floor several times before you find stillness and the perfect position you want your arms in.
- This posture brings harmony to the heart space. Recite these affirmations while you rest.
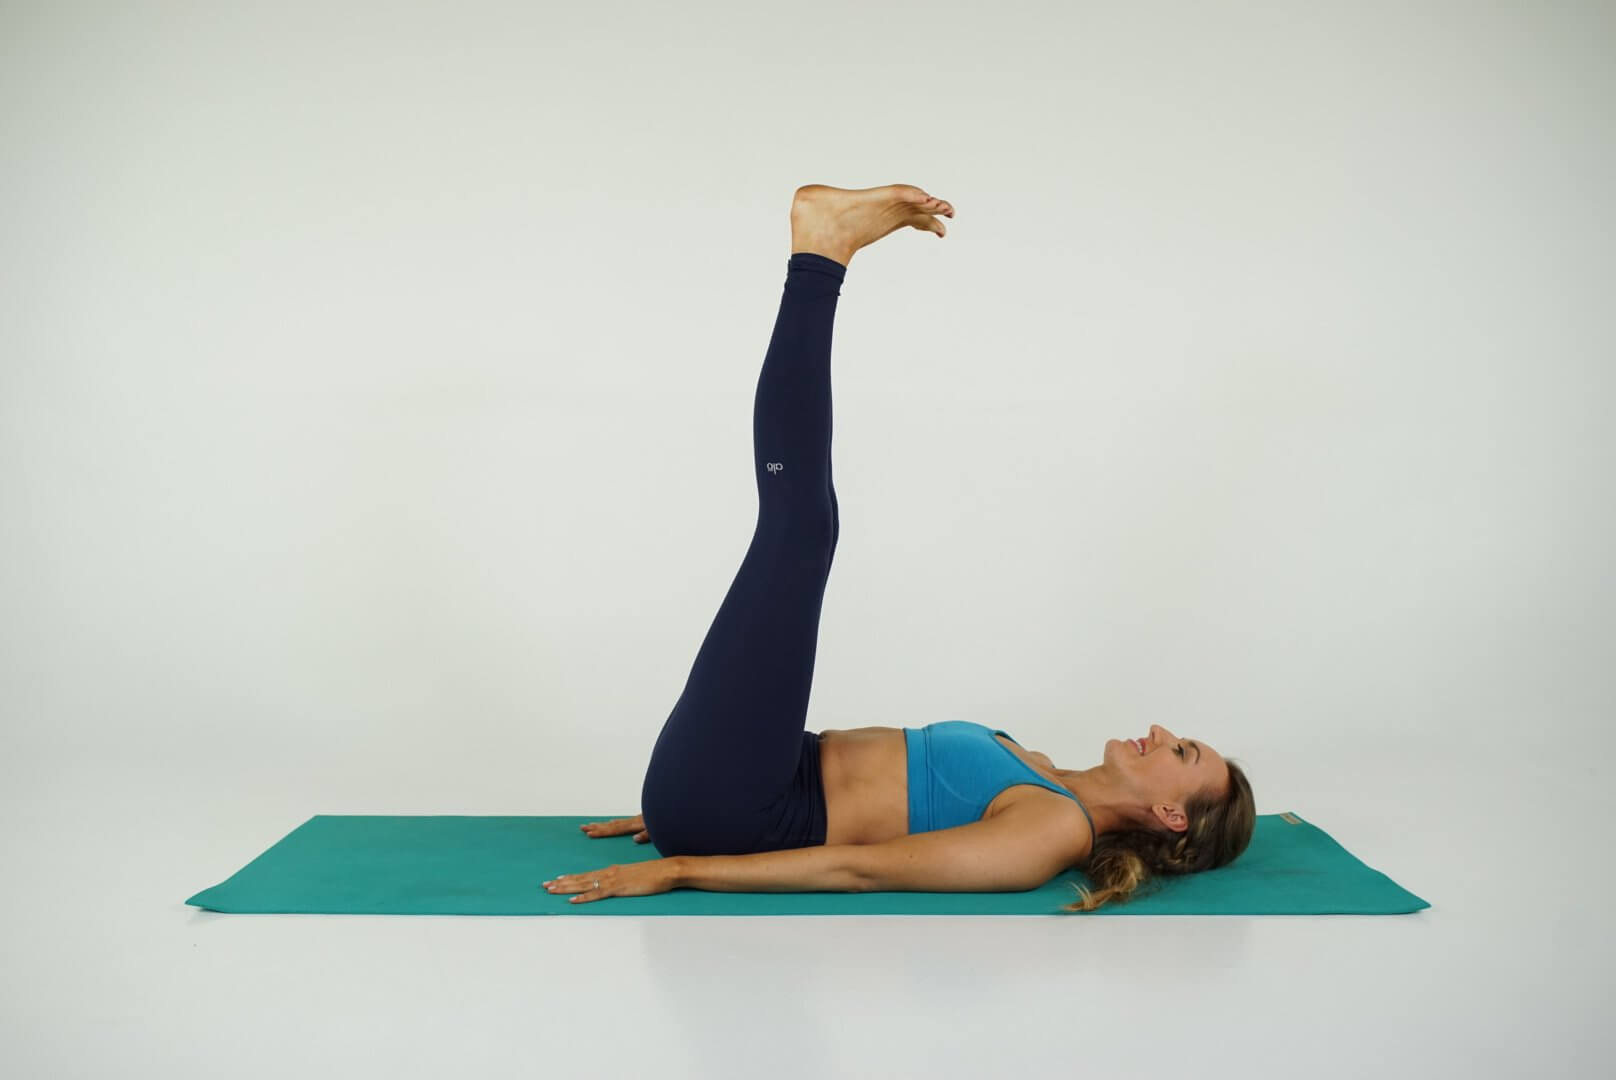
7. Legs Up The Wall (Viparita Karani)
Step 1: From the ground, bring the base of your seat to a wall.
Step 2: Carefully lay the body back on your yoga mat and extend the legs up against the wall towards the ceiling. Breathe deeply.
Step 3: Slowly bring your legs down from the wall, roll to the side and push yourself back to a seated position.
Variations: You can do this pose in bed against your headboard or even against the back of your couch while watching TV!
Benefits: Legs up the wall can instantly calm you, reduce stress and anxiety, and improve mood. It also helps to increase blood flow and circulation.
Uplifted Pro Tips:
- Place your feet on the wall and do some pelvic tilts to move energy through the hips and ready the body for stillness.
- Grief is a time to get fully grounded. This pose is perfect for that and adding a calming pranayama technique will further the grounding process.
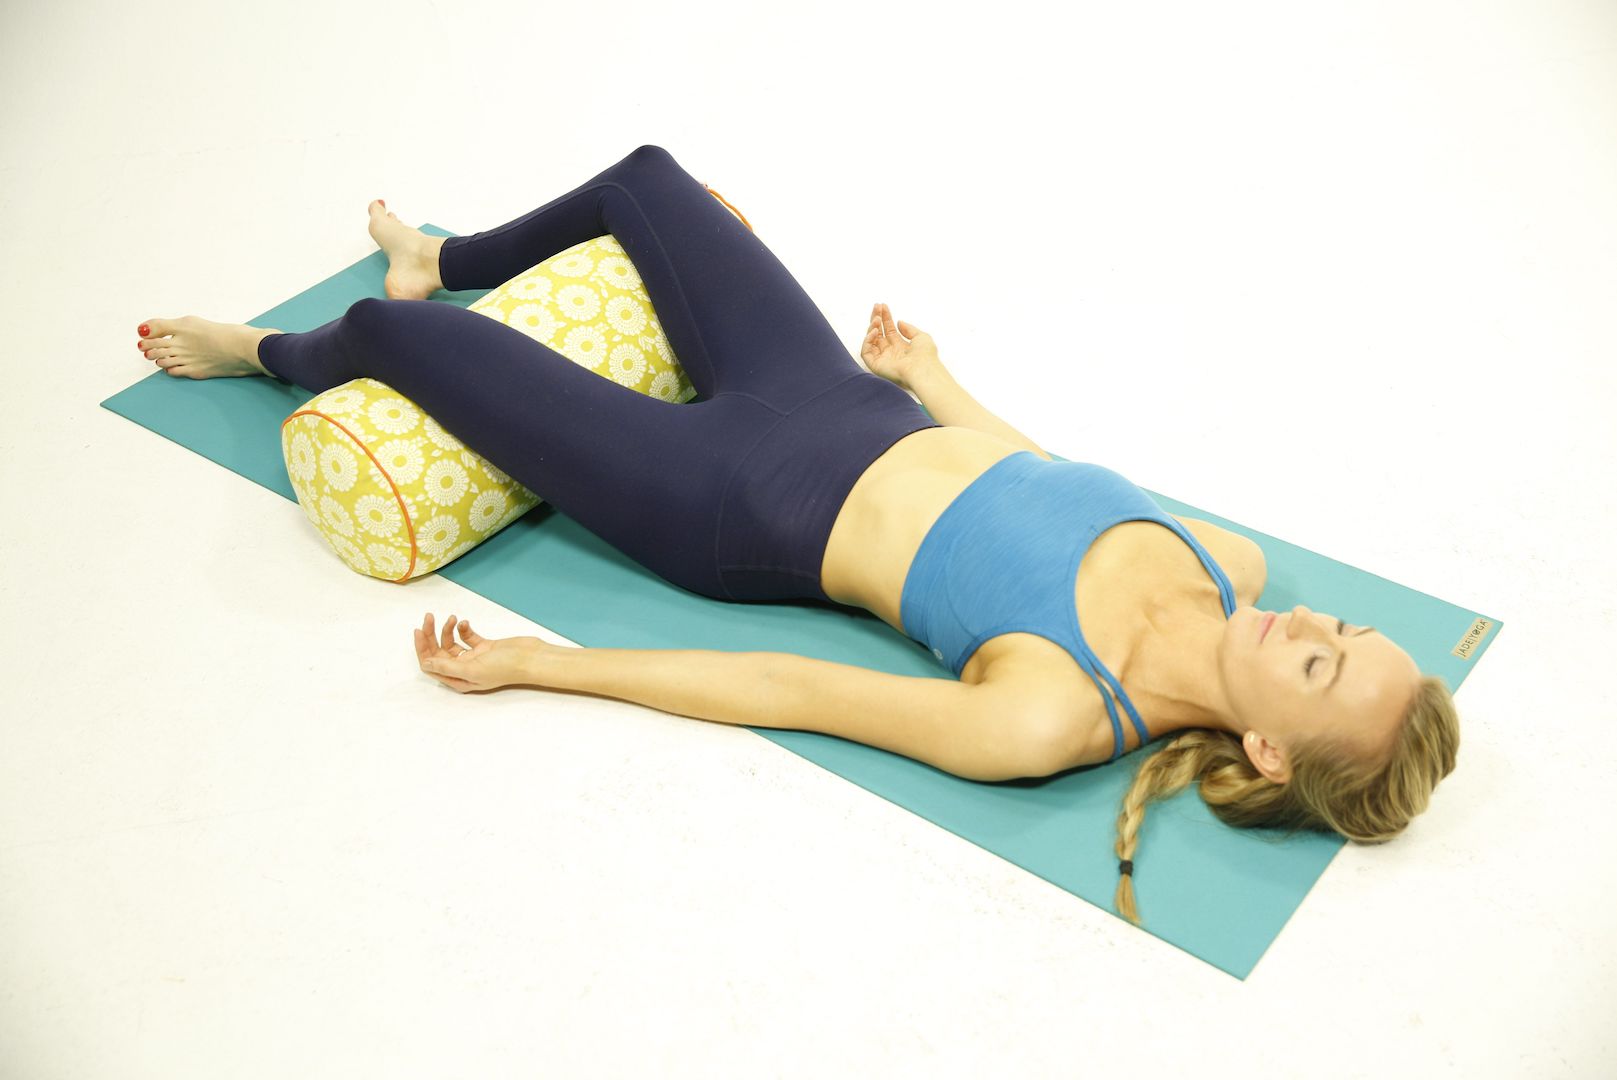
8. Corpse Pose (Savasana)
Step 1: Lie down on your back. Feet as wide as the mat, arms by your sides. Close your eyes and breathe.
Step 2: To release the pose take small movements in the hands and feet then the rest of the body.
Variations: Put a blanket or bolster under your knees to protect the low back. You can also cover the eyes or body to go deeper into the pose.
Benefits: Corpse pose has a calm and soothing effect, deepens the breath, aids in full body relaxation and reduces stress hormone levels.
Uplifted Pro Tips:
- Add in a mudra like apana vayu mudra or surya mudra to encourage healing in your heart space.
- Just like with child’s pose, if this is the only position you think you can do then just stay on your mat right here. It’s still yoga, it’s still honoring your practice. Just lay with yourself and be.
Grief is not a linear process. You may be fine for weeks, months or even years, and then all of a sudden a wave of intense grief will hit you at the reminder of your loved one lost. That’s okay, it’s NORMAL. We all experience grief differently. Come back to your practice. Do self care, guided meditations, etc. You have to feel it fully to cope and move through. You won’t feel this way forever. Go at your own pace, you are stronger than you think, you’ve got this 😘.
Next Steps
- If you’re interested in practical kriya yoga as a way to improve your daily life and relationships, check out my Yoga for Self Mastery course.
- Order my Yoga Life book for a practical guide to creating balance in your life through yoga.
- Check out my YouTube channel and find some yoga classes that you can try out for yourself!
FREE Chakra Balancing Audio Track + Journaling Prompts

Find more yoga sequences by benefit.
YOU MIGHT ALSO LIKE
- How to Teach Somatic Yoga: A Practical Guide for Instructors
- The Best Somatic Exercises for Grief: Find Healing Through Movement
- The Best Somatic Exercises for Anger Management and Emotional Release
- Authentic Pathways: Connecting With Higher Self for Inner Peace
- Yoga to Reconnect with Yourself: 5 Essential Practices for Inner Peace
- Yoga for Connection: 10 Poses to Deepen Relationships and Bonding
- Yoga To Connect With Your Body For Mind-Body Harmony
- Yoga to Connect with Feminine Energy: 5 Transformative Practices
- Yoga to Connect with Your Heart: 3 Poses for Emotional Balance
- Myofascial Release Yoga: Unlock Tension and Improve Flexibility
- 6 Hip Openers For Emotional Release
- Office Yoga: 10 Poses You Can Do Right Now
- Ayurveda Food Combining: The Key to Balanced Digestion
- Yoga For Grief: 8 Yoga Poses For Support
- Yoga for Vata Dosha: Practice Poses and Tips
Learn how to do 11 of the most popular yoga poses correctly. Free video + PDF download.
